
Adding SSL to a SharePoint 2010 Web Application, the Right Way
###The Story
I haven’t touched SharePoint in a while, but I’ve been asked by a friend to help him do something “the right way”.
We were looking for a way to add an HTTPS binding to an existing SharePoint 2010 site. Google is full of ways of doing that, but they
involve adding another binding manually via IIS, like this:
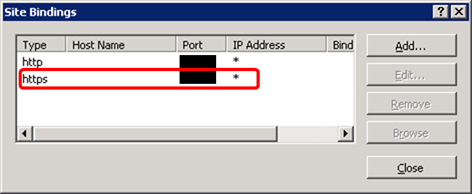
Everyone who’s familiar with SharePoint (and especially with cleaning after poor SharePoint infrastructure work) can see the issue immediately - even if this method works (and it might, with some added configuration) it will only apply to the current SharePoint front-end server - it won’t be reflected in:
- Other servers in the farm
- This server if it’s rejoined (as a troubleshooting measure)
- Future servers added to the farm
This happens because SharePoint is not informed of the new configuration. The right way is through Web Application Extension
What is Web Application Extension
Having more than one binding (a port the IIS site is listening to) is new to IIS 7 (until then, each site had one HTTP port and one HTTPS port). Since SharePoint 2010 is in this mindset (maybe left-overs from 2007), each SharePoint web application is contained in one IIS site, which has only one port.
However, an administrator can “extend” a web application to a child-web application, allowing the same SharePoint sites to be served using different authentication mechanisms, ports etc.
More about extending here.
Basically, you supply SharePoint with information about the new Web Application you want (name, port, SSL, authentication etc.) and the zone it’s capturing (for alternate access
mappings
- other URLs that the application might be viewed from).
Via Central Administration (GUI):
Open “Web Applications Management” and select the Web Application you wish to extend
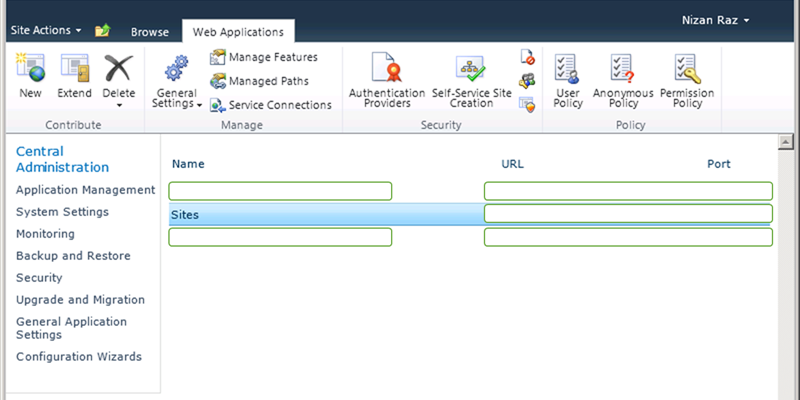
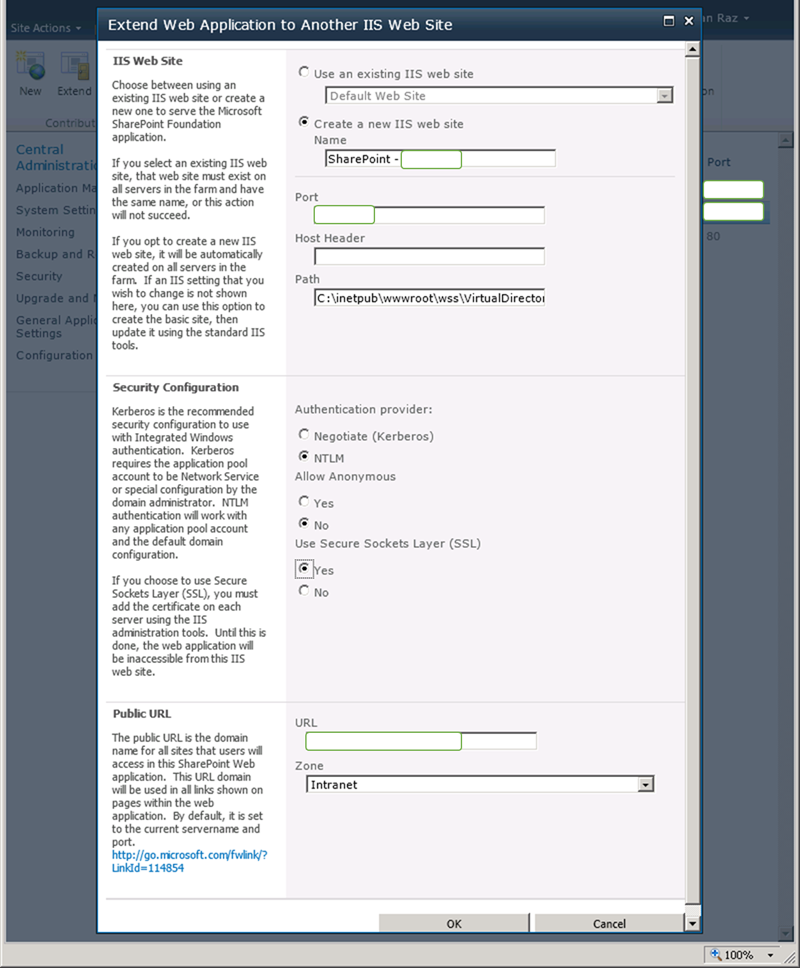
Hit “Extend” (under “Contribute”) and fill the form to match the configuration of the new web application you wish to create. If you’ve used alternate access mappings before with this web application, make sure not to choose a zone you didn’t use already (if you’re not familiar with this term, you’re probably OK with using “Intranet”)
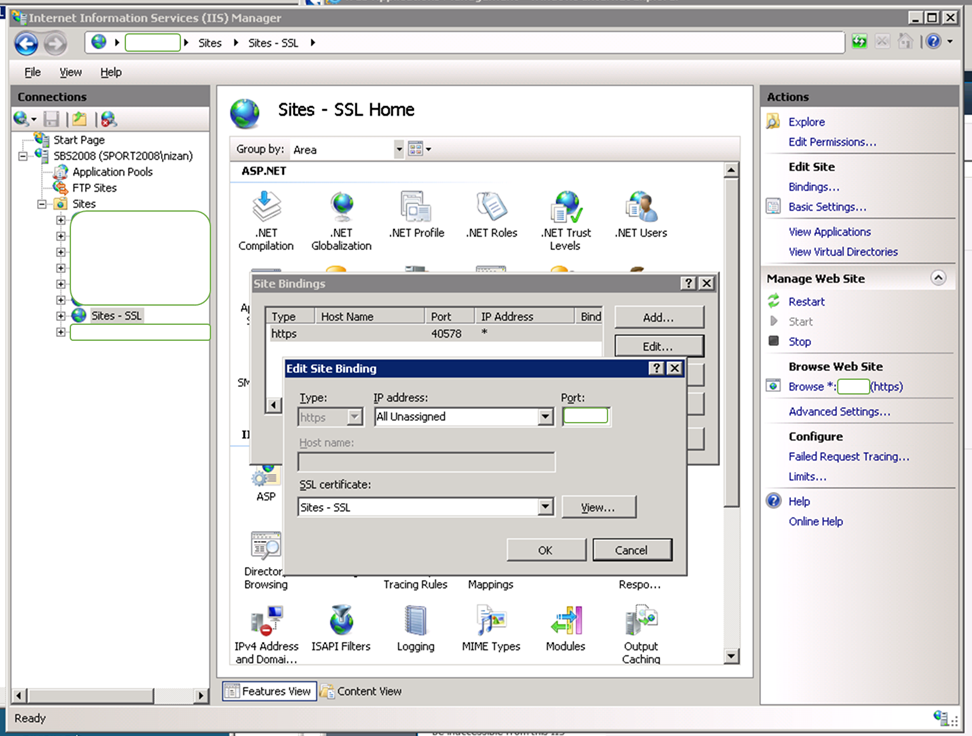
Make sure the IIS site has been created. If you did choose SSL, you probably want to configure the certificate.
Unfortunately, this is done via IIS console (and has to be repeated for every server).
Open IIS console, find your new site and select “bindings”. Choose the only binding there, select “edit” and choose your favorite certificate.
Make sure everything works!
Via PowerShell:
It’s much quicker and even included in the official examples.
Straight from the Snap-in’s documentation:
Get-SPWebApplication 'http://sitename' | New-SPWebApplicationExtension -Name "ExtranetSite" -SecureSocketsLayer -Zone "Extranet" -URL "https://extranet.sitename.com"
“This example extends the given Web application at http://sitename to
the Extranet zone for SSL use.”
You still have to configure the SSL certificate and make sure everything works.
Undoing
To reverse the process, see “Unextend a Web application” for both GUI and PowerShell methods.